How to Clean and Sanitize Your Kitchen Drying Rack | Complete Guide
Your kitchen drying rack is one of the hardest working and most overlooked items in your kitchen. It’s constantly getting wet and harboring moisture, which can lead to the buildup of bacteria, mold, and unpleasant odors over time. That’s why it’s so important to regularly clean and sanitize this kitchen workhorse.
Ideally, you should give your drying rack a quick clean after each use by hand washing it with warm, soapy water and drying it thoroughly. For a deeper cleaning, plan to clean and sanitize it at least once a week if you use it daily. If you have a large family or do a lot of cooking, you may need to deep clean it every 3-4 days.
Signs that your drying rack desperately needs a cleaning include visible grime buildup, staining, lingering funky smells, and obvious mold or mildew growth. Don’t let it get to that point! Stay on top of cleaning this hardworking rack.

How Often Should You Clean and Sanitize Your Drying Rack?
A quick wash with hot, soapy water after each use is ideal. However, for a deeper clean and sanitization, aim to do this:
- Once a week: For regular use and to prevent build-up.
- After a spill: If food or drinks spill on your drying rack, clean it immediately to prevent stains and odors.
- If you notice visible mold or mildew: Time for a deep clean!
Signs Your Drying Rack Needs a Deep Clean
- Slimy or greasy feeling: This indicates a build-up of food residue and bacteria.
- Unpleasant odors: A sign that bacteria are thriving in a moist environment.
- Visible mold or mildew: This can pose health risks and requires immediate attention.
- Stubborn stains: Hot soapy water just isn’t cutting it anymore.
How to Prepare Your Drying Rack for Cleaning
- Gather your supplies: You’ll need dish soap, a sponge or scrub brush, and a dish drying mat (optional) to place under the drying rack while cleaning. For tougher jobs, white vinegar and baking soda can be helpful allies.
- Empty the rack: Clear away any dishes or utensils to give yourself a clean working surface.
- Disassemble if possible: Some drying racks come apart for easier cleaning. Take advantage of this feature to get into all the nooks and crannies.
How to Clean the Kitchen Drying Rack

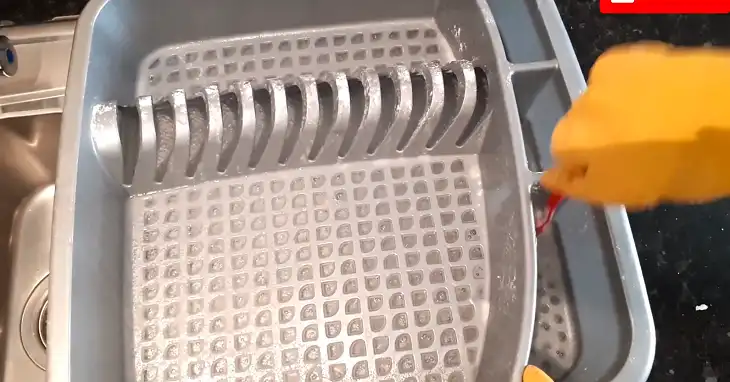
Basic Cleaning: This is your go-to method for regular cleaning. Fill your sink with hot, soapy water, and use a sponge or scrub brush to clean the entire drying rack. Pay close attention to areas where food particles and water tend to gather, like the tines and crevices. Rinse the rack thoroughly with clean water and allow it to air dry completely.
For Tough Stains & Grease: Here’s where baking soda comes in handy. Create a paste by mixing baking soda with a little water. Apply the paste to stubborn stains and greasy areas, and let it sit for 10-15 minutes. This will help loosen the grime before scrubbing it off with hot, soapy water.
Vinegar Soak (for mineral deposits): Hard water can leave unsightly white streaks on your drying rack. To combat this, fill your sink or a large bucket with warm water and add 1 cup of white vinegar. Submerge the drying rack and let it soak for 15-30 minutes. The vinegar will help dissolve mineral deposits, making them easier to scrub away with dish soap.
Deep Clean (heavily soiled): If your drying rack is due for a serious clean, combine the methods above. Start with a hot soapy water scrub, followed by a baking soda paste treatment for stubborn stains. Finally, soak the rack in a vinegar solution to remove mineral deposits.
Sanitizing Your Clean Drying Rack
Now that your drying rack is clean, you can take the extra step to sanitize it and eliminate any lingering bacteria. Choose one of these methods:
Hot Water Soak: Fill a large pot with very hot (almost boiling) water. Carefully submerge the drying rack for 5-10 minutes. This will kill most bacteria. Let the rack air dry completely.
Vinegar Spray (optional): Mix equal parts white vinegar and water in a spray bottle. Lightly mist the drying rack and let it sit for 5 minutes. Rinse the rack thoroughly with clean water and allow it to air dry completely.
When fully dry, reassemble your drying rack if needed and return it to its designated spot. Ideally, store it in a well-ventilated area away from moisture to prevent buildup between uses.
Preventing Rust, Mold, and Future Buildup
To keep your drying rack in top shape, take some preventative measures:
Preventing Rust: Thoroughly dry your drying rack after each use and never leave wet items sitting on it for extended periods. This excess moisture can cause metal racks to rust over time. Also, wipe up any spills or standing water right away.
Preventing Mold: Like rust, mold and mildew thrive in damp, humid environments. Give your drying rack plenty of air circulation and always ensure it’s fully dry before putting it away. Never leave wet dishes or damp towels piled on it.
Spot Cleaning: Get in the habit of doing a quick daily wipe down of your drying rack with a disinfectant cleaner or vinegar spray, even if you don’t see visible grime. This will help prevent buildup.
Dealing With Rust: For existing rust spots, make a baking soda paste and use it as a gentle abrasive to rub at the rust. You can also try using a commercial rust remover product made for kitchens. As a last resort, replace very rusted racks.
Other Cleaning & Sanitization Tips
Different materials require different cleaning techniques. Plastic and vinyl racks can usually go in the dishwasher, while wooden and metal racks need to be hand-washed.
Prevent future buildup by never placing greasy items like bacon or pizza directly on the drying rack without a liner.
If your drying rack is cracked, warped, has stubborn rust that won’t come off, or simply looks very old and worn, it’s time to replace it with a new one.
Use dishwasher-safe drying mats or liners to protect the tines of your drying rack from scratches.
End Notes
Regularly cleaning and sanitizing your kitchen’s drying rack is easy but so important for keeping funky smells, bacteria, mold, and grime at bay. By giving it a quick clean after each use and a deeper scrub down weekly or monthly, you’ll ensure this humble workhouse stays fresh and hygienic.
Develop a routine of quick daily wipe-downs, overnight vinegar soaks for mineral deposits, baking soda scrubs for tough stains and grease, and sanitizing with very hot water or vinegar spray when needed. With just a few simple cleaning practices, you can keep your trusty drying rack looking and smelling clean for years to come.


