How to Fix a Kitchen Faucet Sprayer That’s Not Working?
Kitchen faucet sprayers are essential tools in modern kitchens, offering convenience and efficiency in various tasks. Whether you have a pull-out or pull-down sprayer, these attachments are designed to make washing dishes, rinsing produce, and cleaning sinks much easier. However, when your kitchen faucet sprayer stops working correctly, it can be frustrating and disruptive to your daily routine.
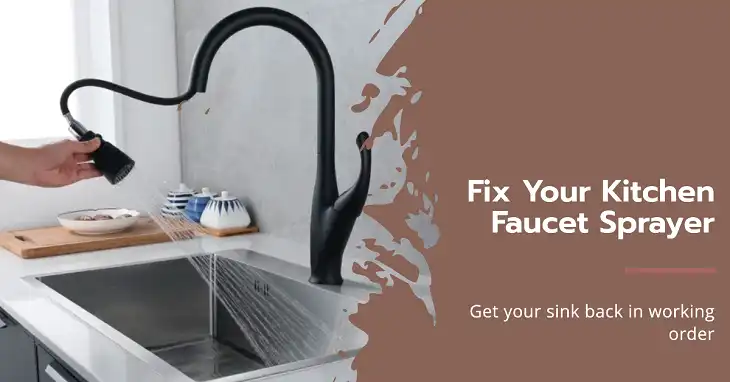
Below, we’ll explore common issues with kitchen faucet sprayers, their causes, and how to troubleshoot and fix them. We’ll also provide tips on maintenance and when it’s best to call in a professional.
What Are the Common Symptoms of a Malfunctioning Sprayer
Before diving into solutions, it’s important to identify the specific problem you’re experiencing. Sometimes there’s no water flow when you activate the sprayer. This can be particularly frustrating when you are in the middle of a task. Other times, it can be a weak or inconsistent water pressure. The sprayer works, but the water pressure is noticeably weak or fluctuates unpredictably.
Apart from the water pressure issue, sometimes leaking occurs from various parts of the sprayer, such as the handle, hose connection, or sprayer head. This can lead to inconsistent spray patterns, erratic or uneven behaviors or switching between modes unexpectedly.
What Causes Kitchen Faucet Sprayer Issues
Understanding the root cause of your sprayer problem is crucial for effective troubleshooting. Let’s explore some common culprits:
- Clogged Sprayer Head or Aerator: Over time, mineral deposits and debris can accumulate in the sprayer head or aerator, restricting water flow.
- Damaged or Kinked Hose: The flexible hose connecting the sprayer to the faucet can become kinked or damaged, impeding water flow.
- Faulty Diverter Valve: The diverter valve, which redirects water from the main faucet to the sprayer, may malfunction.
- Mineral Buildup: Hard water can lead to mineral deposits throughout the faucet system, affecting performance.
- Worn-out O-rings or Gaskets: These small rubber components can deteriorate over time, causing leaks and pressure issues.
- Low Water Pressure: Sometimes, the problem isn’t with the sprayer itself but with the overall water pressure in your home.
- Improper Installation: If the faucet or sprayer was installed incorrectly, it can lead to various issues.
- Damaged Retraction Mechanism: For pull-down sprayers, the retraction mechanism can wear out or break.
- Faulty Internal Valve: The internal valve controlling water flow to the sprayer may be defective.
How to Fix a Malfunctioning or Broken Kitchen Faucet Sprayer
Now that we’ve identified potential causes, let’s walk through some troubleshooting steps:
1. Inspecting the Sprayer Head
Start by examining the sprayer head for visible debris or mineral buildup. You can often clean this with a soft brush or by soaking it in vinegar overnight. For stubborn buildup, gently use a pin to clear individual spray holes.
2. Examining the Hose
Check the entire length of the hose for kinks or damage. Straighten out any kinks and ensure the hose moves freely. If you find damage, you may need to replace the hose.
3. Testing the Diverter Valve
The diverter valve is typically located where the sprayer hose connects to the faucet body. Test it by activating the sprayer while the main faucet is running. If water continues to flow from the main spout, the diverter may be faulty.
4. Addressing Mineral Buildup
For general mineral buildup, try this vinegar soak method:
- Fill a plastic bag with white vinegar.
- Secure the bag around the sprayer head with a rubber band.
- Let it soak for several hours or overnight.
- Remove the bag and run hot water through the sprayer.
For more severe cases, you might need to use a commercial descaling product.
5. Checking and Replacing O-rings
Inspect the O-rings and gaskets for signs of wear or damage. These are often the culprits behind leaks. To replace them:
- Turn off the water supply.
- Disassemble the sprayer head.
- Remove the old O-rings.
- Install new O-rings of the same size.
- Reassemble the sprayer head.
6. Assessing Overall Water Pressure
Test the water pressure at other faucets in your home. If the pressure is low everywhere, you may have a whole-house pressure issue that requires professional attention.
7. Verifying Proper Installation
Ensure all connections are tight and properly aligned. If you’re unsure about the installation, consult the manufacturer’s guide or consider having a professional inspect it.

Image: kitchen faucet sprayer parts diagram
DIY Repair Tips
For those comfortable with DIY repairs, here are some additional tips:
- Always turn off the water supply before starting any repair.
- Keep a bowl or towel handy to catch water when disconnecting parts.
- Take photos as you disassemble components to help with reassembly.
- Use plumber’s tape on threaded connections to prevent leaks.
- Lubricate moving parts with food-grade silicone grease to extend their lifespan.
Should You Repair or Replace Your Faulty Kitchen Faucet Sprayer
Sometimes, replacing your faucet might be more cost-effective than repairing it. Consider replacement if:
- Your faucet is more than 15 years old.
- Replacement parts are no longer available.
- The cost of repairs approaches 50% of the price of a new faucet.
- You want to upgrade to a more modern or efficient model.
Modern faucets often come with improved features and water-saving technologies that can benefit your kitchen and potentially lower your water bills.
Wrapping Up
A malfunctioning kitchen faucet sprayer can be a nuisance, but with the right approach, many issues can be resolved quickly and easily. Regular maintenance and prompt attention to problems can extend the life of your faucet and ensure it continues to function smoothly for years to come.
Remember, when in doubt, it’s always best to consult with a professional plumber to avoid causing additional damage or voiding your warranty. With proper care and timely repairs, your kitchen faucet sprayer will remain a reliable and convenient tool in your daily kitchen tasks.

