How to Tighten a Loose Single Handle Kitchen Faucet Base?

Dealing with a loose faucet base in your kitchen can be a real headache. Not only is it frustrating, but it could also lead to water damage if the faucet base becomes completely detached.
Let’s start by understanding what we’re dealing with. Your kitchen faucet is composed of various components, each playing a crucial role in its function. The base is the part that secures the faucet to the sink, and when it becomes loose, the entire faucet starts to wobble and potentially leak.
There could be several reasons for this loosening, such as worn-out washers, loose cartridges, or even improper installation.
Determining Your Single-Handle Faucet Type
Before we dive into the tightening techniques, let’s first understand the anatomy of your faucet. Different faucet types have different components, and identifying yours correctly is essential for proper repair.
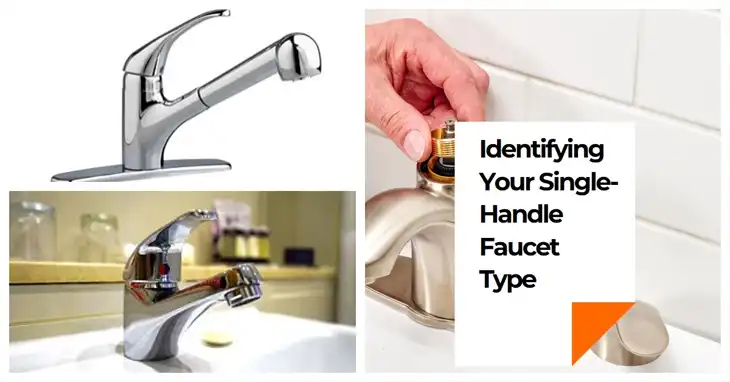
Here’s a quick rundown:
- Cartridge Faucets: These faucets have a cartridge that controls the water flow. Popular brands like Moen, Delta, and Kohler use cartridge faucets.
- Compression Faucets: These faucets use rubber washers and valve stems to control water flow. Brands like Peerless, Wolverine Brass, and Sayco are known for compression faucets.
- Ball Faucets: These faucets have a ball-shaped component that moves to control water flow. Kohler, Delta, and Moen are common ball faucet manufacturers.
- Ceramic Disc Faucets: These faucets use ceramic discs to control water flow and are known for their durability. Brands like Grohe, American Standard, and Danze use ceramic disc technology.
To accurately identify your faucet type, you can refer to the manufacturer’s instructions or use our handy interactive quiz (link/tool). Once you know your faucet type, you’ll be better equipped to follow the right tightening techniques.
Tightening Techniques for Every Type of Single-Handle Kitchen Faucet

Now, let’s get to the heart of the matter – tightening that loose faucet base. Here are step-by-step instructions for the most common faucet types:
Cartridge Faucets
- Turn off the water supply lines and remove the faucet handle.
- Locate the cartridge assembly and use a cartridge puller or pliers to remove it.
- Check for worn-out seals or debris in the cartridge chamber and clean it thoroughly.
- Replace the cartridge if necessary, or reinstall the cleaned one.
- Tighten the mounting nuts or screws to secure the faucet base.
Compression Faucets
- Turn off the water supply and remove the faucet handle.
- Locate the stem, packing nut, and adjusting ring under the sink.
- Use an adjustable wrench to tighten the packing nut firmly, but avoid over-tightening.
- Adjust the ring to ensure proper stem movement and water flow.
- Reassemble the faucet and tighten any remaining mounting hardware.
Ball Faucets
- Turn off the water supply and remove the faucet handle.
- Locate the cam, ball assembly, and retainer nut under the sink.
- Use pliers or a wrench to tighten the retainer nut securely.
- Check the ball assembly for wear and replace if necessary.
- Reassemble the faucet and tighten any remaining mounting hardware.
Ceramic Disc Faucets
- Turn off the water supply and remove the faucet handle.
- Locate the cartridge assembly and mounting nuts under the sink.
- Use a wrench or pliers to tighten the mounting nuts securely.
- Check for any hard water buildup and clean the cartridge assembly.
- Replace the ceramic discs if worn out or damaged.
- Reassemble the faucet and tighten any remaining mounting hardware.
Advanced Faucet Tightening Techniques
Sometimes, you might encounter situations where the nuts or screws are stripped, or the components are stuck and difficult to access. In such cases, you’ll need to employ some advanced tightening techniques. Here are a few ninja-level hacks:
- Invest in a basin wrench or faucet wrench for hard-to-reach areas under the sink.
- Create your own custom tools using zip ties, pliers, or even a rubber strap wrench for better grip on stubborn components.
- Regularly lubricate the faucet components with a silicone-based lubricant to prevent future loosening.
- Consider replacing worn-out components with sturdier, high-quality replacements for added durability.
How to Detect Leaks in Kitchen Faucets?
After tightening the faucet base, it’s crucial to check for any leaks. While a basic visual inspection may catch obvious leaks, you might need to employ advanced techniques to detect hidden leaks. Here’s how:
Use a moisture meter: This tool can detect moisture levels in the surrounding areas, helping you identify hidden leaks behind walls or under the sink.
Leak detection dyes: Adding a leak detection dye to the water supply can help you spot even the tiniest leaks.
Repair minor leaks: For small leaks, you can use plumber’s tape, leak stoppers, or even epoxy putty as a temporary fix.
Address major leaks: If you encounter significant leaks or structural damage, it’s best to call in a professional plumber to avoid further complications.
Summing Up
Congratulations! By following this comprehensive guide, you’ve not only tightened your loose faucet base but also become a true faucet master. You now possess the knowledge and skills to tackle any faucet challenge that comes your way. Share your success stories with others and help them overcome their faucet woes too.
Frequently Asked Questions
Can I tighten a faucet base without turning off the water supply?
It’s generally not recommended to work on any plumbing fixture without first shutting off the water supply. Doing so can lead to water leaks and potential water damage. Always turn off the water supply as a precautionary measure.
What if I can’t remove the faucet handle?
If the faucet handle is stuck or won’t come off, try using a handle puller tool or gently tapping it with a rubber mallet. You can also consult the manufacturer’s instructions for your specific faucet model.
How often should I tighten or maintain my faucet base?
It’s a good practice to inspect your faucet base periodically (every 6 months to a year) for any signs of loosening or leaks. Preventative maintenance and timely tightening can save you from more significant issues down the line.
Can I use the same tightening techniques for a double-handle faucet?
While the basic principles of tightening the base may be similar, double-handle faucets have different internal components and may require slightly different techniques. It’s best to consult a guide or seek professional help specifically for double-handle faucet repairs.
My faucet base is still loose after tightening. What should I do?
If your faucet base remains loose despite your best efforts, it could be due to worn-out or damaged components that need to be replaced. In such cases, it’s recommended to consult a professional plumber or consider replacing the entire faucet assembly.