How To Replace Over The Range Microwave With Vent
While over-the-range microwaves are convenient, dedicated vent hoods offer superior ventilation and can become a striking focal point in your kitchen. This DIY project typically takes 4-6 hours and can save you hundreds of dollars compared to hiring a professional. With careful planning and execution, even moderately skilled DIYers can achieve impressive results.
Replacing an over-the-range microwave with a stylish vent hood can dramatically transform your kitchen’s appearance and functionality. This project not only enhances ventilation but also adds a custom, high-end look to your cooking space.
Tools and Materials Needed
Gather these items before starting:
- Screwdriver set (Phillips and flathead)
- Power drill and bits
- Level
- Stud finder
- Measuring tape
- Vent hood (30″ is standard for most ranges)
- Ductwork and vent caps (if needed)
- Electrical wire, connectors, and electrical tape
- Drywall saw or utility knife
- Safety glasses and work gloves
- Ladder or step stool
- Helper (for lifting and positioning)
Step 1: Prepare for Removal
The first step in this transformation is to properly prepare your workspace. Begin by turning off the power to the microwave at your home’s circuit breaker. This crucial safety measure protects you from potential electrical hazards during the removal process.
Clear the area around and above the microwave, removing any decorative items or kitchenware that might obstruct your work. Empty the microwave itself and any adjacent cabinets to give yourself ample working space. To protect your cooktop from accidental damage, cover it with a drop cloth or a piece of cardboard.
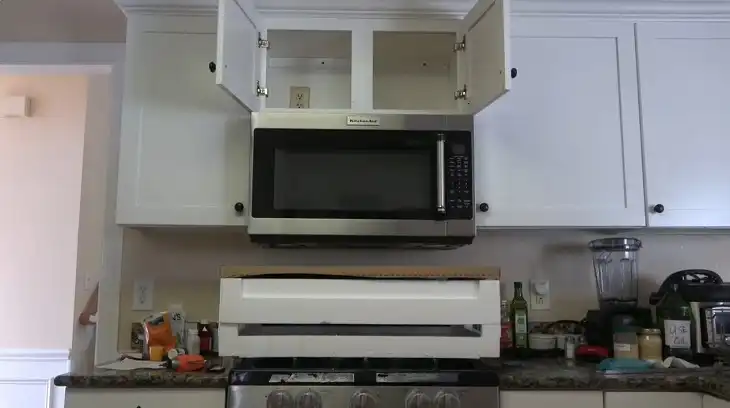
Step 2: Remove the Old Microwave
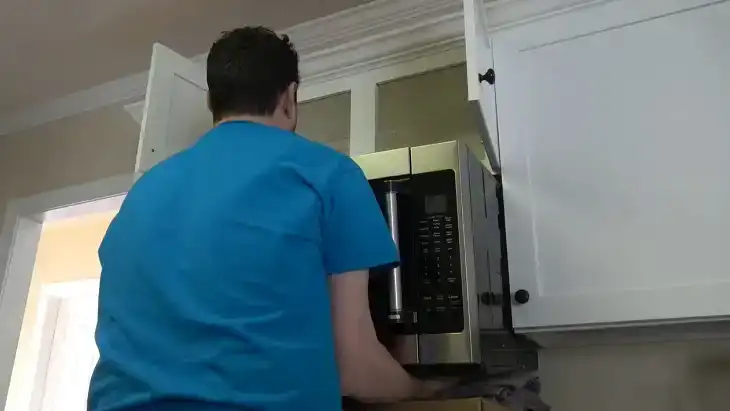
With your preparation complete, it’s time to remove the old microwave. Most over-the-range microwaves are secured by a combination of screws in the upper cabinet and a mounting bracket at the back. Open the cabinet above the microwave and remove any visible screws. These are typically located near the front edge of the cabinet bottom.
Next, locate the main mounting bracket at the back of the microwave. This is where having a helper becomes crucial. While your assistant supports the microwave from below, carefully remove the final screws holding it in place. As the last screw comes out, be prepared for the full weight of the microwave.
Gently lower the microwave and disconnect the power cord. You may need to slide the microwave forward slightly to access the plug. Once disconnected, you and your helper can safely remove the microwave from the kitchen. Don’t forget to remove the mounting bracket from the wall as well, as it won’t be needed for your new vent hood.
Step 3: Assess the Existing Vent and Electrical
With the microwave removed, take a moment to assess your current ventilation and electrical setup. Determine whether your old microwave was venting to the outside or simply recirculating air. If it was venting outside, note whether the duct goes vertically through the roof or horizontally through a wall. This information will be crucial when installing your new vent hood.
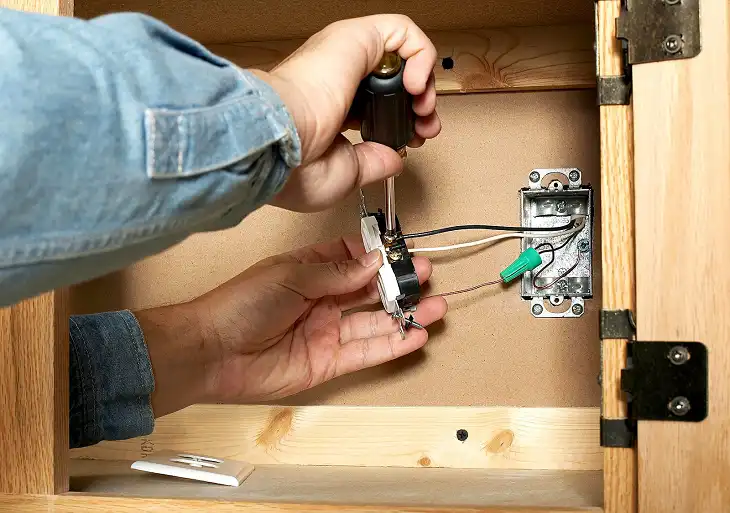
Locate the electrical box that powered the microwave. You’ll likely be using this same box for your new vent hood, so ensure it’s in good condition and properly positioned. Measure the opening where the microwave was installed and compare these dimensions to your new vent hood. This will help you determine if any modifications to the space are necessary.
If your microwave was recirculating air rather than venting outside, you’ll need to install new ductwork for your vent hood. This can be a complex process that might require professional assistance, especially if it involves cutting through walls or roofing.
Step 4: Prepare the Area
Before installing your new vent hood, you may need to do some preparatory work on the surrounding area. If the wall behind the old microwave is damaged or unfinished, now is the time to patch and paint it. This step will ensure a polished look once your new vent hood is in place.
If your backsplash didn’t extend behind the microwave, you’ll need to address this area as well. You might choose to extend your existing backsplash or create a complementary design feature. Whatever you decide, ensuring a cohesive look will elevate the overall appearance of your kitchen.
Step 5: Install Ductwork (If Necessary)
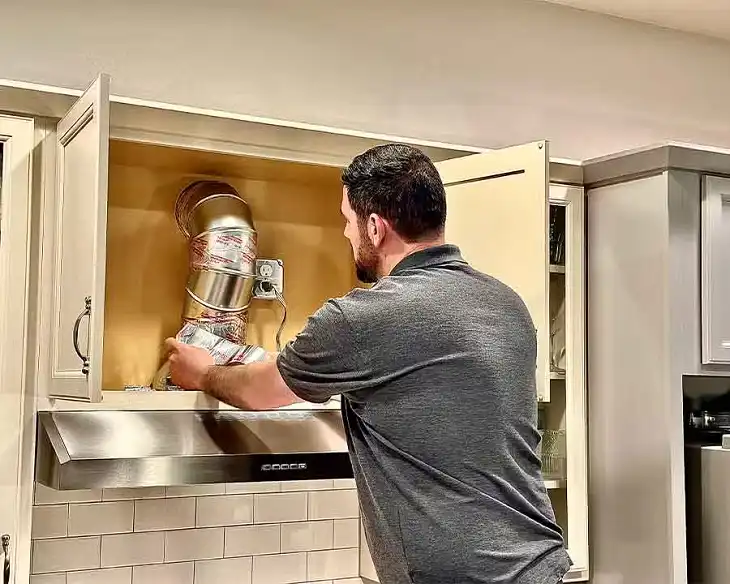
If you’re installing new ductwork, careful planning is essential. Map out the most efficient route from your vent hood to the exterior of your home, keeping bends to a minimum. Each bend reduces the efficiency of your ventilation, so a straighter path is always better.
You’ll need to cut holes in your cabinetry, walls, or ceiling to accommodate the new ductwork. Take precise measurements and use the appropriate tools for the materials you’re cutting through. When installing the actual ductwork, opt for smooth, rigid metal ducts rather than flexible ones. These provide better airflow and are easier to keep clean over time.
Ensure all joints in your ductwork are securely fastened and sealed with aluminum tape or duct mastic. This prevents air leaks and maximizes the efficiency of your new vent hood. Finally, connect your ductwork to an exterior vent cap, which prevents outside air and pests from entering your home.
Step 6: Mount the Vent Hood
With your preparation complete, it’s time to install your new vent hood. Begin by carefully marking the positions for your mounting bracket, ensuring it’s level and aligned with wall studs for maximum support. Drill pilot holes and securely attach the mounting bracket to the wall.
If your new vent hood is particularly heavy, consider installing additional support boards between the studs. This extra measure ensures your vent hood will remain securely in place for years to come.
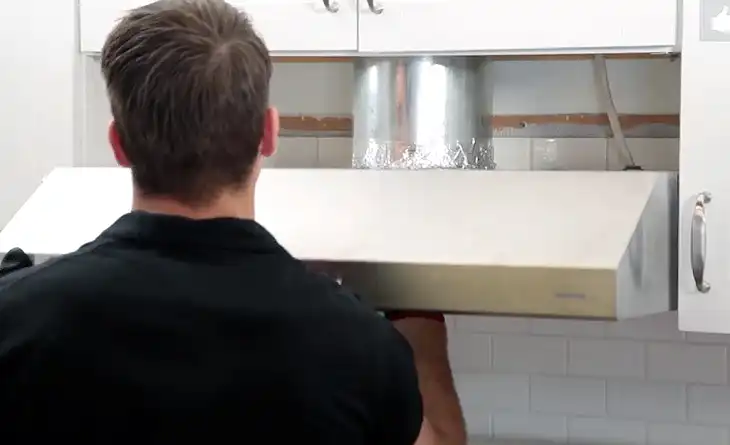
When you’re ready to hang the hood, enlist your helper once again. Together, lift the vent hood and carefully position it on the mounting bracket. Once it’s in place, secure it with additional screws as directed by the manufacturer’s instructions.
Step 7: Connect Electrical and Ductwork
With your vent hood securely mounted, it’s time to make the necessary connections. If you’re comfortable with basic electrical work, you can connect the vent hood to the existing wiring. However, if you have any doubts, it’s always best to consult a licensed electrician. Safety should be your top priority when dealing with electrical connections.
Next, connect your vent hood to the ductwork. Ensure a tight seal between the hood and the duct to maximize efficiency. Use foil tape to seal all duct connections, preventing any air leaks that could reduce the effectiveness of your ventilation.
Step 8: Finishing Touches
To achieve a truly custom look, consider adding some finishing touches to your installation. If there are gaps between your new vent hood and the surrounding cabinets or walls, you might want to add trim pieces for a built-in appearance. Some homeowners even opt to build a wooden surround or extend their cabinetry to encase the hood, creating a seamless, high-end look.
Once everything is in place, thoroughly clean the area. Wipe down your new vent hood and the surrounding surfaces to remove any dust or debris from the installation process.
Step 9: Test and Enjoy
With installation complete, it’s time to test your new vent hood. Turn the power back on at your circuit breaker and try out all the functions of your new appliance. Check each fan speed and test the lights if your model includes them. Pay attention to any unusual noises or vibrations that might indicate an issue with the installation.
As a final check, examine all your duct connections for any air leaks. You can do this by running your hood on its highest setting and feeling around the connections for any escaping air.
Wrapping Up
Replacing an over-the-range microwave with a vent hood is a rewarding DIY project that can significantly elevate your kitchen’s functionality and style. While it requires some effort and planning, the results can transform your cooking space into a more efficient and visually appealing area. Remember to prioritize safety, follow local building codes, and don’t hesitate to consult professionals for complex electrical or ductwork issues.
Frequently Asked Questions
Can I Replace an Over-the-Range Microwave with a Vent Hood?
Yes, you can replace an over-the-range microwave with a vent hood. Vent hoods are an excellent alternative, especially if you prioritize superior ventilation and a cleaner kitchen environment. They effectively remove smoke, grease, and odors from your cooking space, which can be a worthwhile upgrade if you do a lot of stovetop cooking.
Are Over-the-Range Microwaves Hard to Replace?
Replacing an over-the-range microwave is a relatively straightforward DIY project. With basic tools and a bit of patience, most homeowners can handle the installation themselves. The key is to carefully follow the instructions, ensure the new microwave fits the existing space, and securely mount it to avoid any safety issues.
Should an Over-the-Range Microwave Be Vented Outside?
While it’s not required for an over-the-range microwave to be vented outside, doing so is beneficial. Venting to the outdoors helps efficiently remove steam, smoke, and cooking odors from your kitchen. However, many models also offer recirculating ventilation options, which filter the air and recirculate it back into the kitchen.
What Is the Alternative to the Over-the-Range Microwave?
If you’re looking for alternatives to an over-the-range microwave, range hoods and under-cabinet range hoods are popular choices. These options provide better ventilation and can complement a separate countertop microwave or a built-in microwave elsewhere in the kitchen.
Is a Microwave Vent Better Than a Hood?
A standard range hood generally offers better ventilation than a microwave hood combination. Range hoods are designed to move a higher volume of air, measured in cubic feet per minute (CFM), making them more effective at removing smoke, steam, and cooking odors from your kitchen. If ventilation is a top priority, a dedicated range hood is the better choice.