How to Attach Kitchen Drying Rack to Oversized Pegboard?
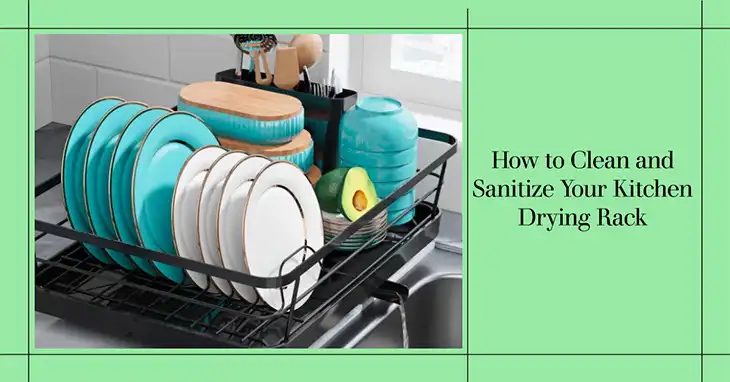
You’ve just finished washing a mountain of dishes, and now you need a place to let them air dry. Sure, you could clutter up your precious counter space with a drying rack, but why do that when you can mount it on the pegboard? It’s a win-win – your counters stay clear, and your dishes have a designated drying zone.
Plus, let’s be real, having a drying rack attached to the pegboard just looks super sleek and professional. It’s like a little kitchen hack that’ll impress all your friends and family (or just yourself, no judgment here). So, want to have the racker as your new partner on your oversized pegboard? In this article, you will have the detail installation procedure! To learn, be my guest till the end!

Steps for Attaching Kitchen Drying Rack to Oversized Pegboard
Drying rack to the oversized pegboard frees up valuable counter real estate. Also adds a touch of sleek, professional organization to your kitchen. It’s like a little kitchen hack that’ll make all your friends and family go, “Ooh, fancy!” (Or, you know, just impress yourself – no judgment here).
Step 1 – Measure the Dimensions of Your Drying Rack
Before we get too carried away, we need to gather some crucial information about your drying rack. Grab that trusty tape measure or ruler and jot down the length, width, and depth of your drying rack. These measurements are going to be our guiding light as we navigate the world of pegboard hooks and installation.
Precision is key here, my friends. We want to make sure your drying rack fits snugly and securely on the pegboard, without any wobbling or shifting around. Safety first, always!
Step 2 – Choose Pegboard Hooks
Now that you’ve got the drying rack dimensions down, it’s time to pick out some sturdy pegboard hooks. These bad boys are going to be the backbone of your setup, so you’ll want to choose wisely.
The main criteria? Find hooks with enough depth and weight capacity to cradle your drying rack comfortably. You don’t want those dishes crashing to the floor, now do you? Here are a few solid options to consider:
J-hooks: These guys have a curved end that can hug and support the drying rack from underneath. Think of them as little cradling arms for your dishes, keeping them safe and secure.
Basket hooks: As the name suggests, these hooks have a flat surface that acts as a tiny basket, providing a stable resting spot for your drying rack. It’s like a cozy little nest for your dishes to chill in while they dry.
Shelf brackets: Shelf brackets let you create a mini shelf by attaching a board or extra piece of pegboard. Then, just plop your drying rack right on top of that snazzy little shelf. It’s like a VIP lounge for your dishes, complete with a prime viewing spot of your kitchen.
Once you’ve chosen your hooks, make sure to grab enough of them to support the entire length of your drying rack. We don’t want any sagging or uneven situations happening here.
Step 3 – Install the Pegboard Hooks
Alright, it’s installation time! First things first, decide on the ideal height for your drying rack. You’ll want it to be at a comfortable level, so you’re not constantly bending down or stretching up to reach your dishes. Trust me, you don’t want to pull a muscle just trying to grab a plate.
Once you’ve settled on the perfect height, start spacing out the hooks to match the width of your drying rack. Make sure they’re level and even – you don’t want any lopsided action going on here. Use a level if you need to, we’re aiming for perfection!
If you went with J-hooks or basket hooks, simply hang the drying rack by resting it on the hooks. Easy peasy, lemon squeezy!
For the shelf bracket route, first attach a board or pegboard piece to the brackets, creating a flat shelf surface. Then, carefully set your drying rack on top of that DIY shelf. You might want to enlist a friend or family member to help with this part, just to make sure everything is nice and secure.
Pro tip: For extra security, use zip ties, bungee cords, or S-hooks to strap down the drying rack to the pegboard hooks or shelf. This way, it won’t go sliding off, even if you get a little too enthusiastic with the dish drying (we’ve all been there, haven’t we?).
Now, take a step back and admire your handiwork! That drying rack is looking mighty fine mounted on the pegboard, isn’t it?
Bottom Line
And there you have it! You’ve now mounted your drying rack securely on the pegboard using sturdy hooks. Not only does it look tidy up there, but you’ve reclaimed all that precious counter space. With the drying rack off the counter, cleaning up after cooking is a breeze. Your kitchen feels so much more open and organized. If any part was confusing, let me know in the comments. I’m happy to clarify or offer more tips. Thanks for following along – enjoy your clutter-free cooking zone!